Rabbit Strips
Rabbit
Strips are great fly tying materials and the absolute best materials
for tying jigs. Their action is better than anything else out there.
Combine the action with the durability, color, and cut choices and
you'll understand why we love them so much. In this article I'm going
to share some history with you and tell you all you need to know to
start tying with them. I'll also explain the difference between tying
flies and jigs with rabbit. Lastly, I'll tell you where you can find a
huge selection of them so you can start tying them on flies and jigs
yourself!
What Are They?
I've heard it said that there's no such thing as a stupid question. I tend to agree, so I'm going to start by answering the most basic question on this particular topic. Then I'll tell you a funny story about a question I received from my wife's aunt and I think you'll get a good laugh. But first, here's what they are...
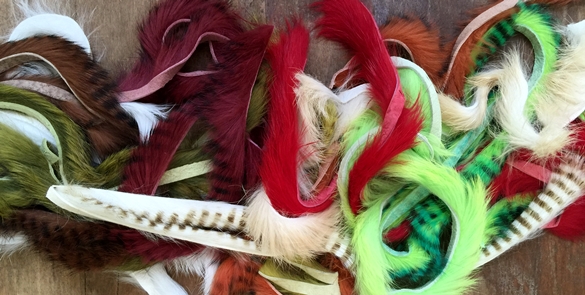
Rabbit Strips are strips of rabbit hide with the hair still on. The
hides are processed and tanned, dyed certain colors, and then cut. As
you see below, they look like leather on one side and soft rabbit hairs
on the other. Now that's probably exactly what you thought they were,
but just in case there was any doubt in your mind I wanted to clear that
up. All of the rabbit strips we use and sell at Buggs Fishing come
from a company called Hareline Dubbin. They're the absolute best in the
business in my opinion. I've been tying with their stuff for almost
twenty years. They produce a consistent product and provide fantastic
customer service to their retailers and manufacturers.
Quick story break: I was at a family gathering, talking to my wife's aunt about my Buggs business. I was explaining to her that I use rabbit on all of my jigs. Then she asked me if I was afraid there would be a shortage of materials. I replied, “But Jan, they're rabbits.” And then I waited. Pretty soon her face turned red and she understood!
History
The earliest reference I could find to tying flies with rabbit strips was in the March 1970 issue of Field and Stream magazine. It explained that nearly forty years prior a New Zealander named Alan Duncum was inspired by his wife's slippers that were trimmed with rabbit. Using some scissors he cut a strip off and used it to tie a trout fly. It also said he was still married to the same lady, so she must have been an understanding wife!
Then I found a reference to a man named Mel Krieger, a well known fly tyer and fly fisherman who may have been the first to bring this idea back to the states. In Steelhead Fly Fishing by Trey Combs, a book I picked up during my time working in a fly shop, Mel's name is mentioned. It explained that after a trip to New Zealand in the late 60's Mel started tying rabbit strip flies for bass, trout, and Alaskan salmon and rainbows.
The last bit of history I'll share with you is of the legendary Double
Bunny fly by Scott Sanchez. This fly had such an impact on my tying
that there's a page dedicated to it on this site. I'll tell you why it
was so significant. The fly was responsible to back-to-back-to-back
wins in the early 90's of the most prestigious fly fishing competition
in the U.S., the Jackson Hole One-Fly. In fact, the rules were changed
that effectively outlawed the fly! This is when tying with rabbit
strips really caught my attention, and eventually led to Buggs Fishing.
Nowadays you'll find rabbit strips nearly everywhere fly tying
materials are sold. There are lots of choices out there. Next we'll
talk about what's available and how to choose the best option for your
flies and jigs.
Different Cuts
Rabbit strips come in four different cuts: Magnum, Zonker, Micro, and Cross Cut. Imagine a rabbit hide layed out in front of you. The hairs lay down pointed toward the tail of the rabbit. Magnum, Zonker, and Micro strips are made by cutting the hide in strips, straight down the back in different widths. Cross Cut strips are made by cutting across the hide. Here are the dimensions and the best uses for each.
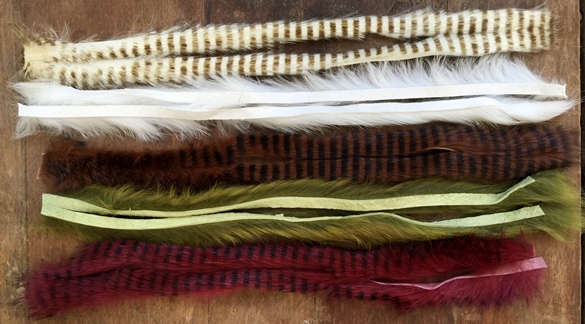
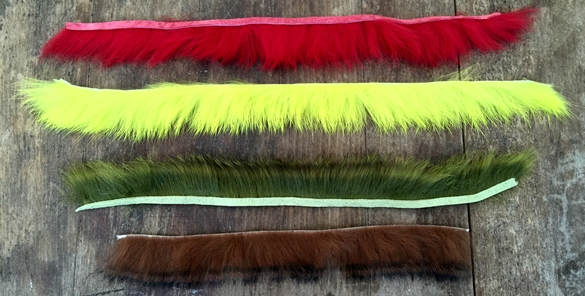
Magnum cut strips are 1/4” wide and the hairs are in line with the hide.
You can see examples below. These are the widest available, and are
great for larger baitfish patterns and to form the backs and bellies of
larger shrimp, crawfish, worm, and crab patterns. They're easy to work
with and easy to cut down the middle when you need to the rabbit strip
to fit over the hook point. They also glue together easily when tying
Double Bunny type flies and jigs. Magnum strips absorb the most water
and should be used sparingly for flies. Water absorption means heavier
flies, something you want to avoid. This is no problem for jigs, and in
fact will make them easier to cast. We use the magnum cut on almost
all of our Buggs. You'll see some examples below.
Zonker
cut strips are 1/8” wide and the hairs are in line with the hide. The
name comes from a style of fly where the strip forms the back of a
baitfish fly. In addition to baitfish flies, Zonker strips work well on
smaller shrimp, crawfish, worm, and crab patterns. They're also easy
to work with, but are harder to cut down the middle. When you need to
slip a zonker strip over the hook point the cut has to be exactly in the
middle and the hook needs to be small so you don't blow out on the side
of the strip. You have to be a bit more careful when gluing these
strips together so excess glue doesn't leak out and glue some of the
hairs together. The width of zonker strips makes them easy to palmer or
wrap around a hook shank to form the collar of a fly or jig. They
won't absorb as much water as magnum strips but you still get some
fantastic action. We use zonker strips on the sides of Curl-Tail Buggs
and to palmer the collars of Slider Buggs, Hydra Buggs, and Beastie
Buggs. Here is a picture of several of the colors we use and offer in
our online store.
Micro
strips are cut more narrow than Zonker strips and the hairs are in line
with the hide. They're a new offering from our supplier, Hareline
Dubbin. I've just begun experimenting with them and can already see
some excellent possibilities. These strips work well on smaller flies
and jigs where hook space is limited. They also work great when you
have to palmer a collar and don't want a lot of bulk. You can get
several wraps of micro strips in a small area. But my favorite use for
this new cut is on woolly bugger flies and jigs. I'll use zonker or
magnum strips for the tail and then palmer a micro strip over chenille
for the body. I haven't tried gluing these strips together but wouldn't
recommend it. I also haven't tried piercing them with a hook, but
believe you could on smaller sizes if you were really careful. We
haven't used this cut on a Buggs offering yet, but I can see us doing so
in the future. Check out the picture below.
Cross
Cut rabbit strips are different from the other cuts. They're made by
cutting across the hide. If you put a piece in front of you with the
hide going across your desk, the hairs will be pointing toward you.
This cut comes in handy when you want the hairs to lay flat and not
create a lot of bulk. We use this cut on the tails of our Loco Buggs,
one of our bonefish jigs. We're also experimenting with this cut on the
body of a baitfish jig. For both of these uses we palmer the rabbit
strip. I'll explain what that means below and tell you how to cut the
end of your rabbit strip before you tie it in. For now, check out the
picture below of several different colors in cross-cut rabbit strips
that we offer.
I
hope the pictures and descriptions of the different cuts have your
creative juices flowing. Rabbit strips can be used in lots of different
ways. I still come up with new uses, even after almost 20 years of
tying with them. So that was every available cut. Now let's move on to
the different colors that are out there.
Color Choices
Rabbit
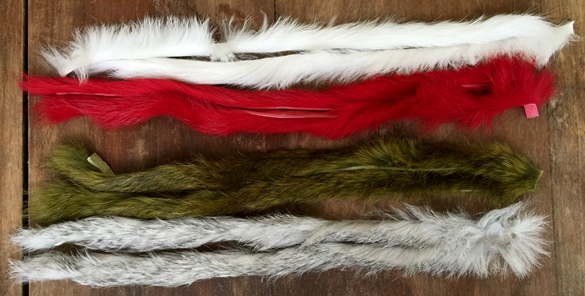
strips come in all sorts of colors. Let's talk about the different
categories and how you might use each one. There are two types of solid
color strips, if you can believe it. Let me explain. The first type
produces a completely solid color. And you can imagine all the
different ones. In the red spectrum there is Red, Wine, Fluorescent
Pink, Rust, Hot Orange, and a few others. It's the same with other
colors - lots of choices. The other solid colors aren't necessarily
solid in shade, but display the natural variance you get with animal
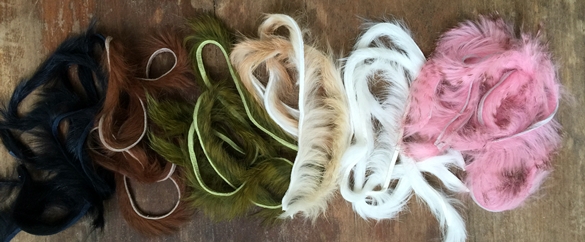
hides. Two of my favorites are olive variant and chinchilla, which you
will find at the bottom of the picture below. You get some accent along
the tips of the hairs along with a mottled look. I really like how
this mimics what you find in the backs of baitfish and crabs. They're
rarely solid, but display the same type of variation.
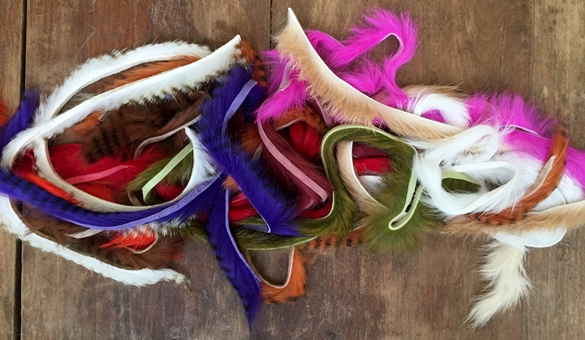
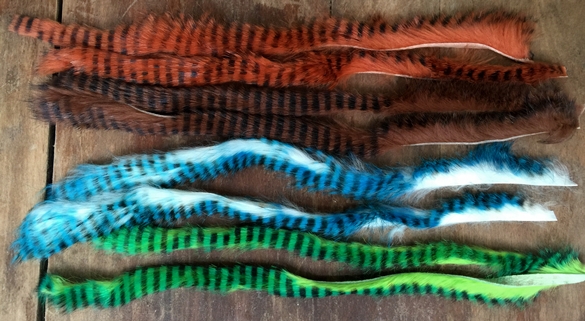
After the solids you have the barred versions. These are made by making stripes across the hides so you get barring along the strips when cut. Almost every solid color out there is available in a barred version. This barring gives flies and jigs extra realism when what you're imitating isn't a solid color. Then there are the tiger barred colors, an even cooler version! Tiger barred rabbit strips are made by dying the tips of a hide a solid color and then barring the tips. Are you familiar with the popular Fire Tiger color of fishing lures? It looks like a fluorescent yellow with a green back with black barring. There's a rabbit strip with those same colors! Below you'll see Black Barred Rust, Black Barred Brown, and two of the Tiger Barred varieties.
Lastly
you have the two tone colors. They start with one color and then dye
the tips a different color. Again, an interesting variation that comes
in handy when imitating something that isn't solid. That about wraps up
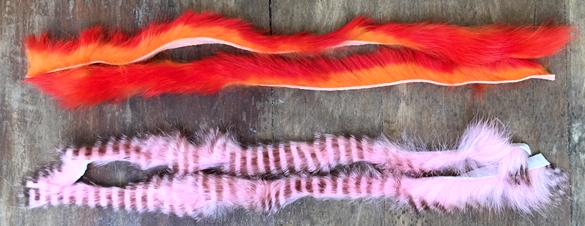
the colors, but I'll offer another plug for Hareline. They'll gladly
do custom work for us when we order enough. We thought it would be
really cool to make a brown barred pale pink for some of our saltwater
jigs. They were glad to do it, and you'll find it on all of our jigs in
the PBT (Pretty Buggy Thing) color. Below you'll see the Fire Orange
two-toned color on top and the custom Brown Barred Pink on the bottom,
both available in our online store.
Hareline
Dubbin does a great job of making a huge variety of colors available.
We have put many beautiful colors of rabbit strips in the online store,
each of them useful for many different applications. Many colors? Oh yes, many! So Hippel, would you say you have a plethora of colors? A what? A plethora. Oh yes, we have a plethora. Hippel, what is a plethora? Why do you ask? Well
you told me you have a plethora of colors, and I just would like to
know if you know what a plethora is? I would not like to think that a
person would tell someone he has a plethora of colors and find out that
that person has no idea what it means to have a plethora! Forgive
me sir. I know that I, Hippel, do not have your superior intellect and
education. But could I just ask you to take a look for yourself?
Please click any of the above pictures in this article and see all of
the available colors and cuts in the online store.
Tying Flies and Jigs with Rabbit Strips
This advice will deal with color choices, tying tips, and how they look and act in the water. In clearer water and for pickier fish you can't go wrong by tying your flies and jigs to closely resemble what the fish are eating. The first rule of thumb is to always make the backs a darker color than the bellies. That's just how everything is colored, so why not? Even when tying with wild colors I follow this rule. An exception to this rule is jigs and flies that are solid black and solid white. These colors just work, and should always be in your arsenal.
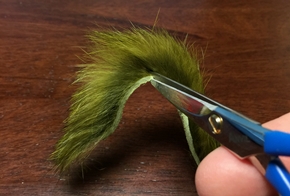
Cutting rabbit requires care and a good pair of scissors. When I first
started tying I was surprised at the cost of scissors. But once I got
into it I realized how important they were and how much I used them.
Cutting rabbit is where they earn their keep, and there are two main
reasons. The first is the precision. Fly tying scissors have sharp
points for the precise placement of the cut. This is important with
rabbit strips because they need to be cut so that the hairs extend past
the hide. You accomplish this by positioning the blade right along the
hide before you cut.
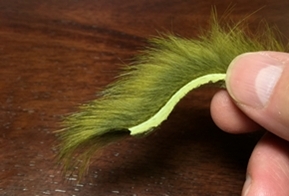
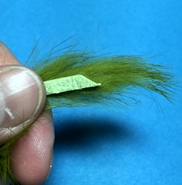
As you'll notice in the picture above, the hairs aren't compromised and still extend past the hide. This will give your flies and jigs a tapered look and a more realistic impression of a baitfish. The other reason good scissors are important is because cutting through rabbit hide is difficult with dull or weak scissors. Tying with cheap, ineffective scissors will waste your time and prove frustrating! Want to know what scissors we use when tying Buggs? Click either picture above and you'll see.
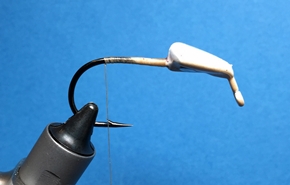
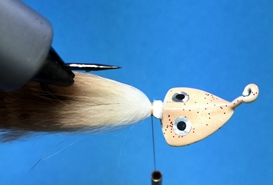
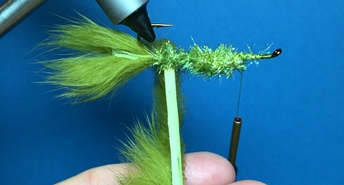
I always make thread wraps on the hook shank before tying a jig or fly with rabbit. The hide will tend to slip on a bare hook shank. Another good idea is to make the tightest wraps slightly away from the end. You get some compression of the hide and hairs when you cinch down, so make those tight wraps and half hitch and leave some room. It will make it harder for the rabbit strip to be pulled out and your thread wraps won't slip off the end. See the pictures below.
Ever
heard the term "palmer" regarding tying flies and jigs? It means to
wrap materials around the hook shank so that the materials flare out.
It normally refers to feathers, but rabbit strips can really enhance a
fly or jig! When you need to palmer rabbit, start with tail end and
make a diagonal cut so it's easier to tie down. Here's what it should
look like. I start with the tail end so I get the hair standing up
immediately. Before I start wrapping, I hold the strip and pull the
hairs towards the back of the jig so the hairs won't get palmered over.
When you're done palmering, make at least three thread wraps at the end
point before you cut the rabbit strip.
Here's
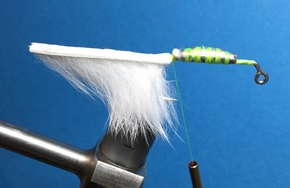
a good trick for making a rabbit belly of a fly or jig. Tie in the
tail end of the strip on the hide side with the hair up against the
hook. Then you can pull the strip forward and not have to fool with
gluing two strips together. Speaking of gluing strips together, there's
only one way to do it. Tearmender is a special leather and fabric glue
and the only thing that works (you can find it in our online store on
the Buggs Tying Tools page). When you use this trick for making the
belly, you'll have to consider how long the top strip will be. If it's
too long it might foul, or wrap around the hook and look unnatural.
That brings us to how rabbit strips look and act in the water.
Simply
put, nothing comes alive and moves better than rabbit strips when
they're wet! But wet is the key word, and there are a couple things to
consider. The more rabbit you use, the more water your fly or jig will
absorb. This will make it heavier, of course. Too much weight will
make a fly a pain to cast and fish. There's no issue with jigs. That's
why I said that rabbit is a great fly tying material and the best
material for tying jigs. That's why we use it on all our Buggs.
Speaking of absorbing water, here is how that happens and that leads us
to another important tip.
Fishing Tips for Rabbit Strip Flies and Jigs
The hide portion of rabbit strips holds little air pockets, and they won't look right and move right until you get the air pockets out. Before you make a cast with your fly or jig, you must hold it under the water and squeeze the rabbit strips between your fingers. You'll see little air bubbles escape, and that will mean the hide is absorbing water. That will also make the strips come alive! If you don't do this the hair will look matted and a lightly weighted rabbit fly won't even sink. Flies and jigs tied with rabbit have to be wet, soaked all the way through, before you cast them.
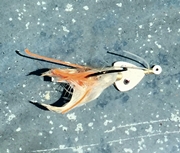
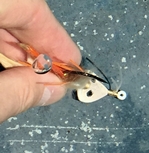
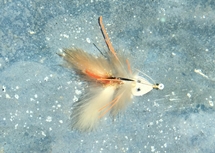
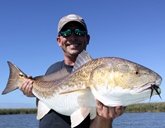
But when they're wet, oh man do they look alive! Take our Beastie Bugg. It's made for sight-casting to redfish who cruise shallow water looking for baitfish, shrimp, and crabs. A Beastie Bugg is tied with magnum rabbit strip claws, a palmered zonker strip body, a zonker mouth piece as an accent, and a magnum rabbit strip belly. Yes, that's a lot of rabbit! But that sucker looks alive, even when sitting on the bottom! And the redfish absolutely love it (as do speckled trout, flounder, bass). On the left is a picture of a Beastie Bugg right out of the package and dropped in the water. In the middle picture you'll see an air bubble escaping as I squeeze the jig. Then on the right you'll see how much better it looks after the air bubbles are out. Any current or twitch of your rod tip and the Beastie Bugg looks alive!
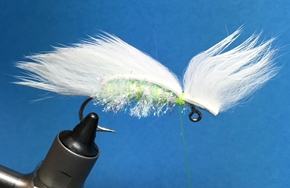
When rabbit strips get wet they get very supple and the hairs move a lot. That's what gives them the action. You have to take this into consideration when you're designing your jigs and flies. If you have a long rabbit tail there's a chance that it might foul or wrap around the hook and look unnatural. There are a couple of possible solutions. A double bunny tail, where two pieces are glued together, will be more resistant to fouling. But you also might be able to shorten your tail and still get some good action. That's because the hair of the rabbit strip extends from 3/4” to a full 1” past the hide. So a rabbit strip tail that extends just 1” past the hook will appear longer in the water because of the hairs that extend past the hide.
This wraps up the basic tips on tying with rabbit strips. I hope you've
enjoyed learning about them and I hope these tips help. So much of
learning to tie is knowing a few basic steps and then learning the rest
while you tie over months and years. It's a very rewarding hobby and
can lead into an obsession! Catching a fish on a fly or jig you tied
yourself is one of the most rewarding experiences imaginable, and I hope
you'll find out if you haven't already.
Where to Buy Rabbit Strips
We offer a huge selection of rabbit strips through the Buggs Fishing online store. Yes, some would call it a plethora. All of the cuts you read about and dozens of the colors are available. Click here to see them all.
Home > Make Fishing Lures > Rabbit Strips

